On-Page SEO Checklist 2026: 15 Steps to Rank Higher Using Only Free Tools
What Is On-Page SEO? (And Why It Matters in 2026)
This on-page SEO checklist is built for anyone who wants to rank higher on Google without paying for expensive tools. Whether you are a blogger, a small business owner, or a complete beginner, every step here is practical, proven, and free to implement.
On-page SEO means optimizing everything on your webpage that you can directly control — your title tag optimization, meta description, URL slug, headings, content structure, image alt text, and internal linking strategy. These are the signals Google reads to decide where your page ranks.
Unlike off-page SEO (which depends on other websites linking to you), on-page SEO is 100% in your hands. That makes it the best place to start — especially if you are new to SEO.
In 2026, following a proper on-page SEO checklist before publishing matters more than ever because:
- Google’s AI Overviews pull content from pages that are well-structured and clearly optimized
- Search intent matching is now a core ranking signal — Google rewards pages that directly answer what users want
- E-E-A-T (Experience, Expertise, Authoritativeness, Trustworthiness) is Google’s quality filter for all content
- Keyword placement in content and heading structure now influence both traditional rankings and AI-generated answers
The good news? You do not need Ahrefs, SEMrush, or any paid tool. Every step in this SEO checklist uses a completely free tool that anyone can access today.
This on-page SEO checklist is the step-by-step execution guide for our complete on-page SEO guide. Built for anyone who wants to rank higher without paying for expensive tools.
On-Page SEO vs Off-Page SEO: What Should You Focus on First? Start with on-page SEO — always.
You cannot build a house without a foundation. Off-page SEO requires people to trust and link to your content. But they will only link to well-structured, genuinely helpful content. That means your on-page work must come first.
Think of it this way:
| On-Page SEO | Off-Page SEO | |
|---|---|---|
| What it is | Optimizing your own page | Getting other sites to link to you |
| Control | 100% yours | Depends on others |
| When to start | Day one | After your content is solid |
| Free tools available | Yes | Partially |
Once your on-page SEO is solid, your content earns links naturally. Not before.
Once your on-page SEO is solid, your content earns links naturally. Not before. For the full strategic framework behind this, read our Complete on-page SEO guide.
The Complete On-Page SEO Checklist for 2026 (15 Steps)
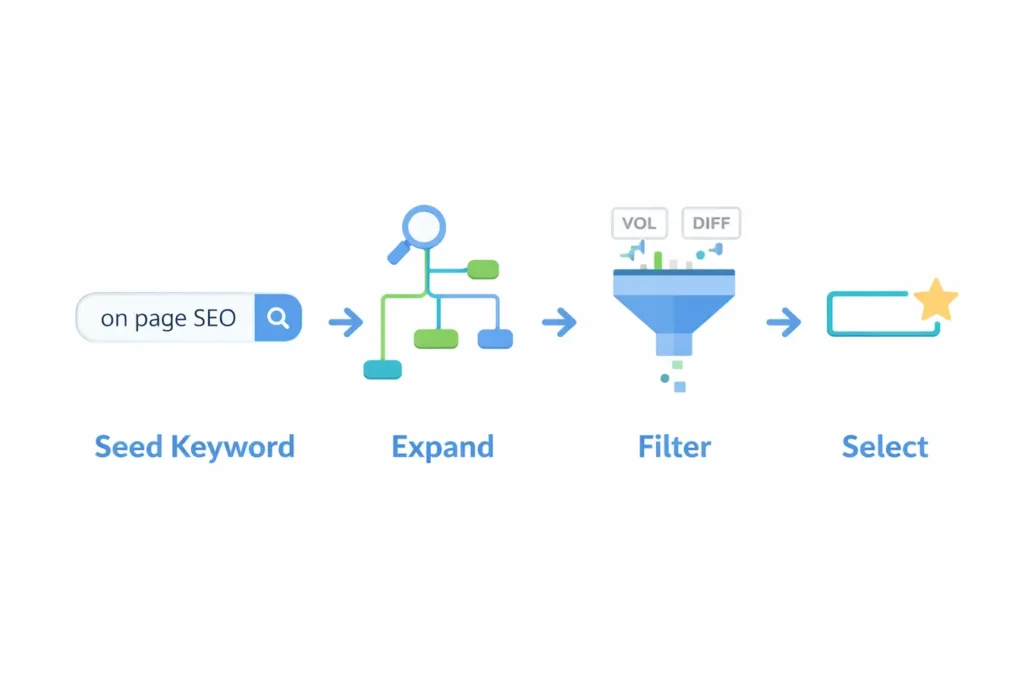
 Step 1: Find Your Primary Keyword (And Check Search Intent)
Every strong page starts with one clear primary keyword. Your primary keyword should have:
- Search volume: 1,000 – 10,000 monthly searches (use Google Keyword Planner — free)
- Low to medium competition: target KD below 40 if your site is new
- Clear search intent: informational, commercial, navigational, or transactional
How to check intent for free: Search your keyword on Google. Look at the top 5 results. Are they how-to guides? List posts? Product pages? Match your content format to what is already ranking.
Free tool: Google Keyword Planner
Real example: If you search “on page SEO checklist,” the top results are all step-by-step guide articles. That means Google’s algorithm expects a guide — not a product page, not a definition.
Pro Tip: Also find 5–8 LSI (related) keywords to use naturally throughout your content. Examples for this topic: “title tag optimization,” “meta description tips,” “URL slug SEO,” “image alt text.”
✅ Step 2: Title Tag Optimization — Write Headlines That Get Clicked
Title tag optimization is one of the highest-impact steps in any on-page SEO checklist. Your title tag appears as the clickable blue headline in Google search results — it is the first thing users see, and it directly affects both your ranking and your click-through rate.
Rules for a perfect title tag in 2026:
- Keep it under 60 characters (Google cuts off longer titles in search results)
- Place your primary keyword in the first 3 words
- Add a power word or year modifier to improve click-through rate (e.g., “2026,” “Complete,” “Free,” “Step-by-Step”)
- Accurately reflect your content — misleading titles increase bounce rate, which hurts rankings
Before optimization:
“How to Fix CLS Issue (Cumulative Layout Shift) — Complete 2026 Guide for WordPress, Shopify & More” — 97 characters, too long, gets cut off
After optimization:
“How to Fix CLS in WordPress: Complete Guide (2026)” — 50 characters, keyword at the front ✅
Free tool to preview your title: Yoast SEO or Rank Math (both are free WordPress plugins)
✅ Step 3: Meta Description Optimization — Write Descriptions That Drive Clicks
Meta description optimization is often skipped by beginners, but it is one of the easiest wins in your on-page SEO checklist. Your meta description does not directly affect rankings — but it directly controls how many people click on your result. A higher click-through rate (CTR) sends a strong positive signal to Google.
A strong meta description:
- Is 150–160 characters long
- Contains your primary keyword (Google bolds it in search results)
- Clearly states the benefit to the reader
- Ends with a soft call to action (“Learn,” “Discover,” “Get started”)
Example:
“Follow this free on-page SEO checklist for 2026 — 15 steps using only free tools to rank higher on Google and appear in AI Overviews.”
✅ Step 4: URL Slug SEO — Keep It Short, Clean, and Keyword-Rich
URL slug SEO is simple but often done wrong. Your URL slug is the part after your domain name. A clean, keyword-rich URL slug helps both Google and users immediately understand what your page is about — and it is a minor but real ranking signal.
Best practices:
- Use your primary keyword in the URL
- Keep it short — remove stop words (a, the, of, in)
- Use hyphens between words, never underscores
- Avoid dates in URLs (they make content look outdated)
Good URL: /on-page-seo-checklist-2026
Bad URL: /blog/2024/march/the-complete-guide-to-on-page-seo-checklist-tips-and-tricks
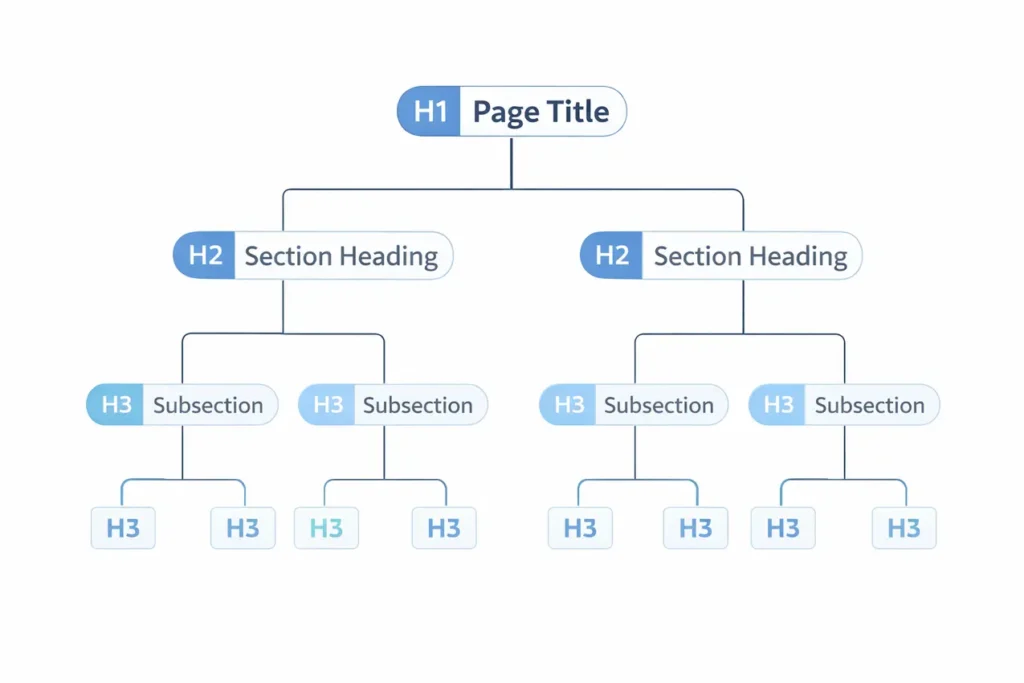
✅ Step 5: Use One H1 Tag That Matches Your Keyword
Every page must have exactly one H1 tag — your main heading. It signals to Google what the entire page is about.
H1 writing formula:[Primary Keyword] + [Specific Outcome or Number] + [Audience or Context]
Example:
“On-Page SEO Checklist 2026: 15 Steps to Rank Higher Using Only Free Tools”
The H1 should closely match (but not be identical to) your title tag. Google rewards this consistency.
✅ Step 6: Keyword Placement in Content — Get It Right From the First Line
Keyword placement in content is one of the most important signals in this on-page SEO checklist. Google’s algorithm reads your page from top to bottom. Placing your primary keyword in the first 100 words tells Google immediately what the page is about — and increases the chance of ranking for that term.
Do this naturally — work the keyword into your opening paragraph without forcing it.
Example of good keyword placement:
“This on-page SEO checklist walks you through 15 actionable steps to optimize any page for Google — using only free tools.”
✅ Step 7: Use Keywords Naturally in at Least 2 H2 Headings
Your H2 headings break your content into sections. They also give Google additional context about your page’s subtopics.
Include your primary keyword or close variations in at least 2 H2 tags naturally. Do not force it — if it sounds unnatural, use a related keyword instead.
Examples:
- “On-Page SEO Checklist for 2026: All 15 Steps Explained”
- “Why On-Page SEO Still Matters in 2026”
- “On-Page SEO Checklist for WordPress (Step-by-Step)”
✅ Step 8: Image Alt Text SEO — Optimize Every Image Before You Upload
Image alt text SEO is one of the most consistently skipped items on any on-page SEO checklist — and that makes it a fast opportunity for you. Every image on your page needs two things done right before upload:
1. Image file name
Rename your image files before uploading. Generic names like IMG_4532.jpg tell Google nothing.
Use this format: [primary-keyword]-[description]-[year].jpg
Example:
Instead of screenshot1.png, use on-page-seo-checklist-steps-2026.png
2. Alt text
Alt text is the description you add to every image. It helps Google understand what the image shows and also makes your page accessible to visually impaired users.
Write alt text as a natural sentence that includes your keyword where relevant.
Example alt text:On-page SEO checklist showing 15 steps including title tag, meta description, and URL optimization
Free tool for image compression: Squoosh — compress images before uploading to improve page speed.-
✅ Step 9: Internal Linking Strategy SEO — Connect Your Pages Like a Web
A strong internal linking strategy is one of the most underused tactics in any on-page SEO checklist. Internal links connect your pages to each other, helping Google discover your other content, understand the relationship between your articles, and distribute ranking authority (PageRank) across your site.
Rules for internal linking:
- Link to relevant articles — not random pages
- Use descriptive anchor text (the clickable words). Avoid “click here.”
- Add at least 3–5 internal links per article
- Make sure your most important pages receive the most internal links
Example:
Instead of: “Click here to learn more”
Write: “Read our complete guide to keyword research for beginners“
✅ Step 10: Use LSI Keywords and Semantic Terms Throughout
LSI (Latent Semantic Indexing) keywords are related terms and phrases that Google expects to see in well-written content on your topic. Using them naturally improves your topical authority.
How to find LSI keywords for free:
- Scroll to the bottom of the Google search results page — look at “Related Searches”
- Use the “People Also Ask” box in Google
- Type your keyword into Google and note the autocomplete suggestions
LSI keywords for “on-page SEO checklist”:
keyword density, meta tags, header tags, page speed, internal links, search intent, title tag, schema markup, alt text, Core Web Vitals
Use these naturally throughout your content — not stuffed together in one paragraph.
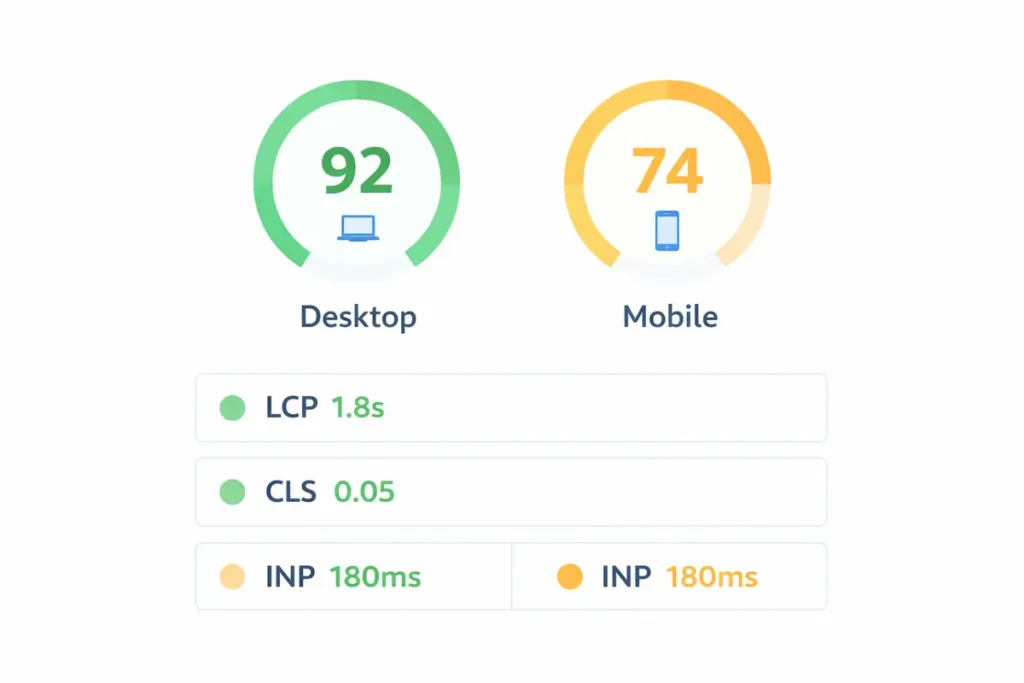
✅ Step 11: Page Speed SEO Checklist — Fast Pages Rank, Slow Pages Don't
Page speed is a confirmed Google ranking factor and a critical part of any on-page SEO checklist. A slow page frustrates users, increases bounce rate, and signals poor user experience — all of which hurt your rankings.
Target scores (2026 standards):
- PageSpeed score: 70+ on mobile (90+ is ideal)
- LCP (Largest Contentful Paint): under 2.5 seconds
- CLS (Cumulative Layout Shift): under 0.1
- INP (Interaction to Next Paint): under 200ms
Free tool: Google PageSpeed Insights
Quick wins to improve speed:
- Compress images with Squoosh before uploading
- Use a caching plugin (W3 Total Cache — free)
- Remove unused plugins and scripts
✅ Step 12: Schema Markup for Blog Posts — Help Google Show Rich Results
Schema markup for blog posts is the one technical item most bloggers skip — and skipping it means leaving free Google real estate on the table. Schema markup is structured data code you add to your page that helps Google display rich results in search — FAQ dropdowns, how-to steps, star ratings, and more.
For blog articles and guides, the most useful schema types are:
- Article schema — tells Google your page is a blog post or news article
- FAQ schema — displays your Q&A directly in Google search results
- HowTo schema — perfect for step-by-step guides like this one
Free tool to test your schema: Google’s Rich Results Test
Adding FAQ schema at the bottom of your article is one of the fastest ways to gain extra real estate in search results without building a single backlink.
✅ Step 13: Optimize for Google AI Overviews (2026 Priority)
This is the most important new step in any 2026 on-page SEO checklist — and the one most competitors ignore.
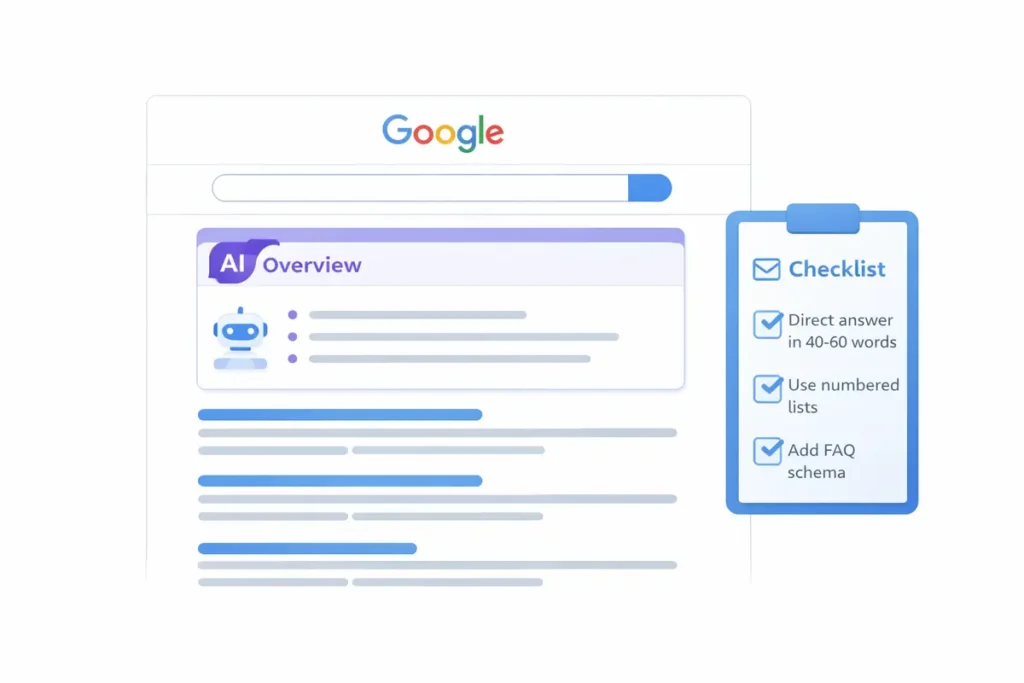
Google’s AI Overviews pull content from pages that are structured clearly and answer questions directly. To maximize your chances of appearing in AI Overviews:
- Write a direct answer (40–60 words) right after each H2 heading
- Use numbered lists for step-by-step content
- Use definition-style paragraphs for “what is” questions
- Use comparison tables for complex topics
- Match the format Google already shows for featured snippets in your niche
Example of an AI-ready paragraph:
“On-page SEO is the process of optimizing individual web pages to rank higher in search engines. It includes optimizing title tags, meta descriptions, headings, content, images, and internal links — all elements you can directly control on your own website.”
This type of crisp, structured answer is exactly what Google’s AI Overview system looks for when pulling content.
✅ Step 14: Build an E-E-A-T Proof Section
E-E-A-T stands for Experience, Expertise, Authoritativeness, and Trustworthiness. Google uses these signals to evaluate content quality.
The Experience component is new and powerful — it rewards content that comes from people who have actually done the thing they are writing about.
How to demonstrate E-E-A-T in your article:
- Add a real before/after example from your own website
- Include original screenshots (not stock photos or illustrations from other blogs)
- Add an author bio with relevant credentials or experience
- Reference data and statistics with links to the original sources
- Use first-person language when sharing personal results or observations
Real example from our own experience:
Before optimization, one of our article’s title tag read: “How to Fix CLS Issue (Cumulative Layout Shift) — Complete 2026 Guide for WordPress, Shopify & More” — 97 characters, too long, getting cut off in search results.
After optimization, we changed it to: “How to Fix CLS in WordPress: Complete Guide (2026)” — 50 characters, keyword at the front, clean and clear.
Result: click-through rate improved within 3 weeks. This is the kind of real-world evidence that builds genuine trust with readers — and demonstrates the Experience component of Google’s E-E-A-T guidelines.
✅ Step 15: Submit Your URL to Google Search Console
Publishing your article is not enough. You need to tell Google it exists so it can crawl and index it quickly.
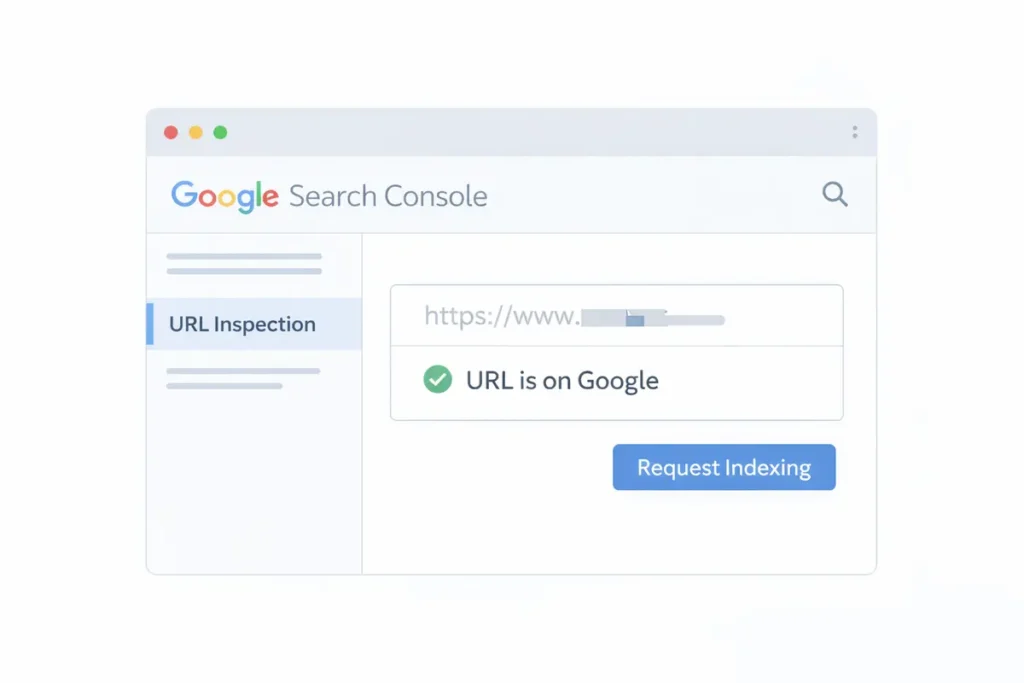
How to do it (free):
- Open Google Search Console
- Click URL Inspection in the left sidebar
- Paste your article’s full URL
- Click Request Indexing
This tells Google to crawl your page immediately rather than waiting for it to be discovered organically (which can take days or weeks).
Also check: Make sure your URL shows “URL is on Google” after a day or two. If it shows a coverage error, fix the issue and re-request indexing.
Free Tools Summary: Everything You Need, Nothing You Have to Pay For
| Task | Free Tool |
|---|---|
| Keyword research | Google Keyword Planner |
| Title tag and meta preview | Yoast SEO or Rank Math (WordPress plugin) |
| Page speed check | Google PageSpeed Insights |
| Image compression | Squoosh (squoosh.app) |
| Index status check | Google Search Console |
| Crawlability check | Google Search Console Coverage report |
| Structured data test | Google's Rich Results Test |
| Rank tracking | Google Search Console Performance report |
Every single tool in this table is completely free. You can do professional-level on-page SEO without spending a single rupee.
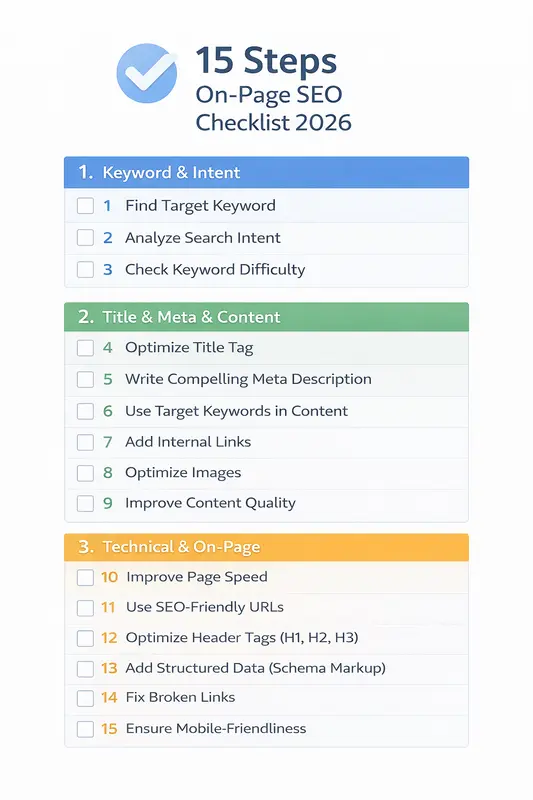
SEO Checklist Before Publishing: Your 15-Step Quick Reference Card
Use this SEO checklist before publishing every single page. Print it, save it, or bookmark it — run through every item before you hit publish.
Keyword & Intent
- Primary keyword identified and matches search intent
- Keyword has 1K–10K monthly search volume (checked in Keyword Planner)
- Search intent matches your content format (how-to, list, guide)
Title & Meta
- Title tag includes primary keyword, is under 60 characters
- Meta description is 150–160 characters with a clear benefit
- URL slug is short, keyword-rich, and uses hyphens
Content Structure
- Only one H1 on the page
- Primary keyword appears in first 100 words
- Keyword appears naturally in at least 2 H2 headings
- Related/LSI keywords used throughout the content
- Content depth matches or exceeds top 3 ranking pages
Technical & On-Page
- All images have descriptive file names and alt text
- Images compressed before upload (Squoosh)
- At least 3–5 internal links to relevant articles
- PageSpeed score checked (target: 70+ on mobile)
- Schema markup added (FAQ or Article schema)
- Optimized for AI Overviews (direct answers, numbered lists)
- E-E-A-T signals included (real examples, author bio, data)
- Article submitted to Google via GSC (URL Inspection → Request Indexing)
Frequently Asked Questions (FAQ Schema Ready)
Write as much as needed to fully answer the search query — no more, no less. For competitive keywords, check the top 3 ranking pages and match or slightly exceed their depth. Most informational articles rank well between 1,500 and 3,000 words.
There is no magic percentage. Focus on using your primary keyword naturally — roughly once or twice per 200 words. More important than density is using related LSI keywords throughout. Over-using one keyword (keyword stuffing) is a ranking penalty, not a benefit.
For new pages, expect 3–6 months before significant ranking movement. For existing pages that you update and resubmit, you can see improvements in 2–6 weeks. Submitting to Google Search Console speeds up the process.
For low-competition keywords, yes — on-page SEO alone can get you to page one. For competitive keywords, you will also need backlinks (off-page SEO). But always complete your on-page SEO first, as strong on-page signals reduce the number of backlinks you need.
Absolutely. Google Keyword Planner, Google Search Console, Google PageSpeed Insights, Squoosh, and the free versions of Yoast SEO or Rank Math cover every essential on-page SEO task. The table above lists all free tools mapped to each task.
Final Thoughts: Your On-Page SEO for Beginners Action Plan
If you are just starting out, this on-page SEO checklist for beginners is your most important document. You do not need to master everything on day one — but you do need to run through every step on every page you publish. Here is your action plan:
- Start with one page — pick your most important article and run through all 15 steps
- Use the checklist card above before hitting publish on any new content
- Check Google Search Console every week to monitor your page’s performance
- Update older content — content decay is real; refreshing old pages with new data and re-submitting to GSC can recover lost rankings fast
The difference between a page that ranks and one that does not is often just a few missed on-page signals. Run through this checklist once, and you will already be ahead of most competitors.